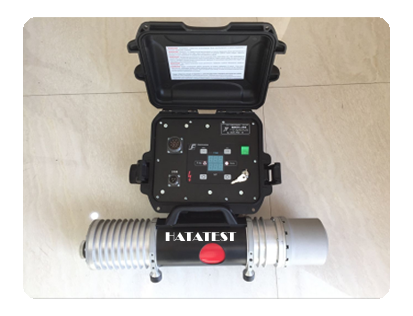
Ultrasonic Testing, referred to as UT in the industry, is a non-destructive testing technology that is the most widely used, the most frequently used and the fastest in the development of Nondestructive Testing. When an ultrasonic wave enters an object and encounters a defect, part of the sound wave will be The reflection is generated, and the receiver can analyze the reflected wave to accurately and accurately detect the defect, and can display the position and size of the internal defect, and determine the thickness of the material. It is also an indispensable means of equipment maintenance.
Ultrasound is a mechanical wave with a frequency higher than 20 kHz. The frequency commonly used in ultrasonic testing is 0.5 to 10 MHz. This kind of mechanical wave can propagate in the material at a certain speed and direction, and a heterogeneous interface (such as a defect or the bottom surface of the object to be tested) that has different acoustic impedance will produce reflection. This reflection phenomenon can be used for ultrasonic testing.
There are many ways to classify ultrasonic testing methods. The more common ones are as follows:
1. Classification by principle: pulse reflection method, diffraction time difference method (TOFD), penetration method, resonance method.
2. Sort by display mode: A type display and ultrasonic imaging display (can be subdivided into B, C, D, S, P type display, etc.).
3. Classification by wave type: longitudinal wave method, transverse wave method, surface wave method, plate wave method, creep wave method, etc.
The most commonly used is the ultrasonic pulse reflection method of the A-type display. The voltage from the pulse oscillator is applied to the probe (detection element made of piezoelectric ceramic or quartz wafer), and the ultrasonic pulse emitted by the probe passes through the acoustic coupling medium (such as oil). Or water, etc.) enters and propagates in the material. After encountering the defect, part of the reflected energy returns to the probe along the original path, and the probe converts it into an electrical pulse, which is amplified by the instrument and displayed on the screen of the oscilloscope tube. The position and approximate size of the defect can be determined based on the position and amplitude of the reflected wave on the screen (compared to the amplitude of the reflected wave of the artificial defect in the reference block). In addition to the echo method, there is a penetration method that accepts a signal on the other side of the workpiece with another probe. When the physical properties of materials are detected by ultrasonic methods, the characteristics of sound velocity, attenuation, and resonance of ultrasonic waves in the workpiece are often utilized.
Advantages of ultrasonic testing methods:
1 Suitable for a variety of parts such as metal, non-metal and composite materials.
2 The detection speed is fast and the penetration ability is strong.
3 High sensitivity to assess the depth and relative size of the defect.
4 Safe operation, simple and light, strong maneuverability, convenient and practical in the field and aerial work.
Shortcomings of ultrasonic testing methods:
1 Be careful by experienced personnel.
2 pairs of rough, irregularly shaped, small, thin or heterogeneous materials are difficult to inspect.
3 mainly detects internal defects, there is a surface "blind zone", and the ability to detect the surface is limited.
-
 Sales@hata-ndt.com
 -
 0086-0371-86172891

