1. General principles
Each non-destructive testing method has its scope and limitations, and should ensure sufficient space for implementation.
1.1 Non-destructive testing methods that can only detect defects on the surface opening include penetration testing and visual inspection. Penetrant testing is mainly used for non-porous materials; visual inspection is mainly used for the detection of macroscopic visible defects.
1.2 Nondestructive testing methods that can detect surface opening defects and near-surface defects include magnetic particle testing and eddy current testing. Magnetic particle detection is mainly used for ferromagnetic materials; eddy current detection is mainly used for conductive metal materials.
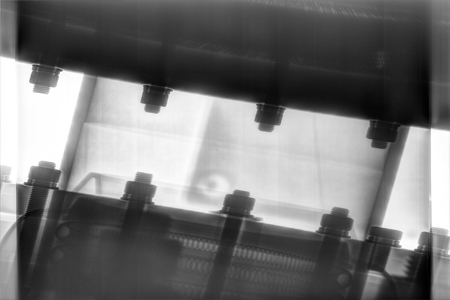
1.3 Nondestructive testing methods that can detect any positional defects in the material include radiographic testing, ultrasonic testing, ultrasonic time difference diffraction testing, and X-ray digital imaging testing.
1.4 In order to determine the intensity and approximate location of active defects existing inside or on pressure equipment, acoustic emission testing may be used. Acoustic emission testing requires pressurization tests on pressure-bearing equipment. When active defects are found, other inspection methods should be used for re-inspection.
1.5 Non-destructive testing methods that can only detect penetrating defects or overall compactness of pressure equipment are leak detection.
1.6 For ferromagnetic materials, in order to detect surface or near-surface defects, the magnetic particle detection method should be preferentially used, and other non-destructive testing methods can be used when magnetic particle detection cannot be used due to structural shapes and other reasons.
1.7 When a non-destructive testing method is used for testing in accordance with different testing processes, if the test results are inconsistent, the evaluation level with a higher risk shall prevail.
1.8 When two or more testing methods are used to test the same part of pressure-bearing equipment, the rating shall be assessed according to their respective methods.
2. Radiographic inspection
2.1 Scope of competence
(A) Detect defects such as under-welding, pores, slag inclusions, cracks, and notch fusion in welded joints;
(B) Defects such as shrinkage, inclusions, pores and porosity in the casting can be detected;
(C) The location, size, and nature of the defect's plane projection can be determined;
(D) The penetration thickness measured by radiation is mainly determined by the energy of the radiation.
2.2 Limitations
(A) It is difficult to detect defects in thick forgings, pipes and bars;
(B) It is more difficult to detect defects in the surfacing layer of the T-shaped welding joint box;
(C) It is difficult to detect fine cracks and unfused layers between the welds;
(D) It is difficult to detect the planar defects in the weld when the diameter of the tested equipment is large and the central exposure method is used for the r-ray source;
(E) It is difficult to detect the height of the defect itself and determine its depth position.
-
 Sales@hata-ndt.com
 -
 0086-0371-86172891

